Time Tracking
The fastest way to track time is right from the Track screen. Select a customer, tap a service, and the timer starts. Need to log past work? Use the same flow and switch to Manual mode.
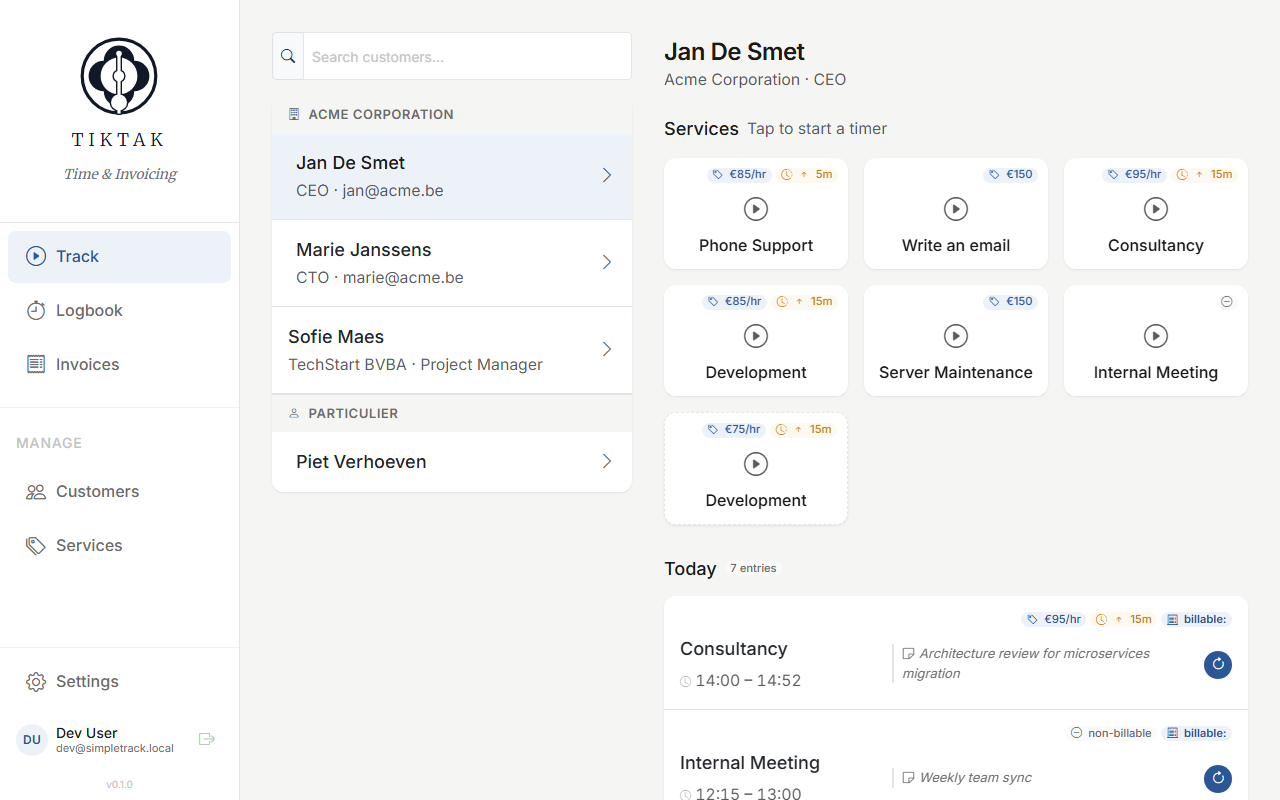
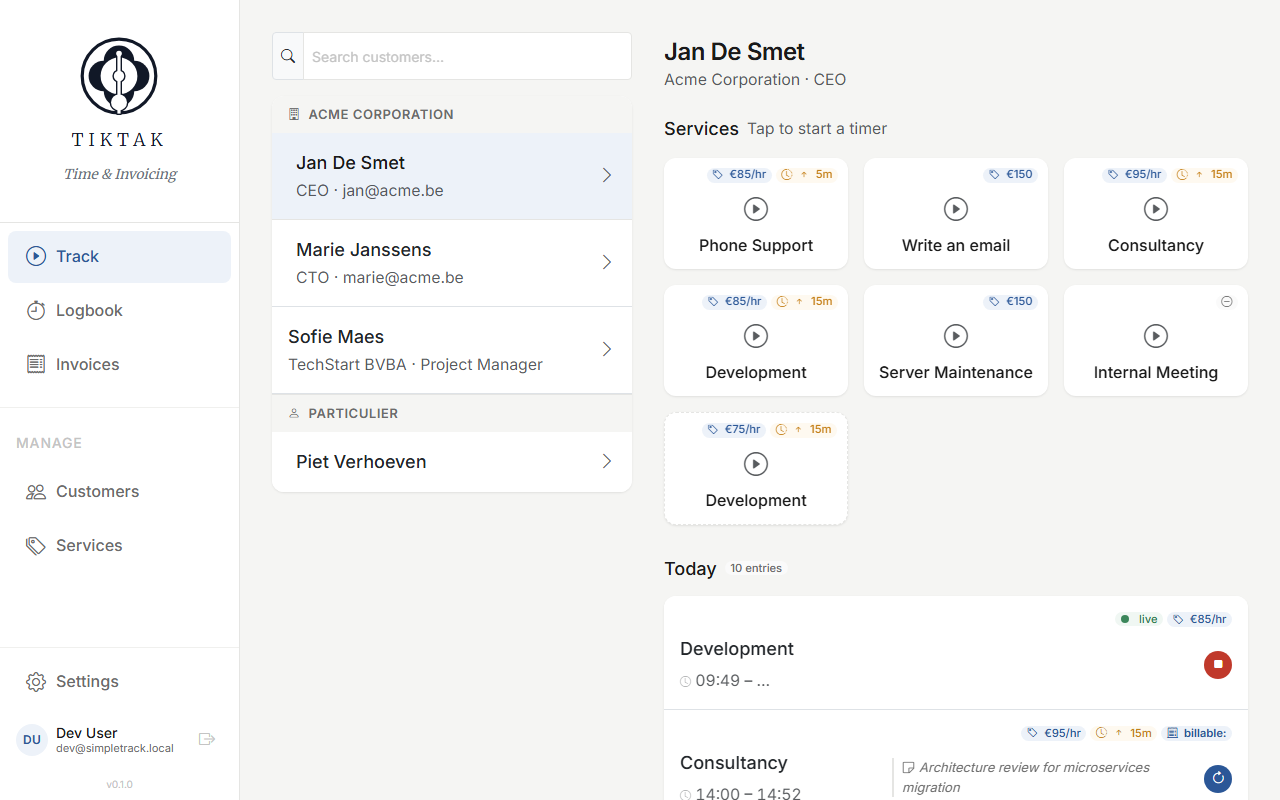
Track: your daily hub
The Track screen is where you'll spend most of your day. Select a customer on the left, and the right panel reveals all the services you can track time on — each card shows the rate (hourly or fixed). Below the service cards, you'll see today's entries for this customer with rate and billable duration pills, plus a continue button to quickly resume previous work.
Starting a timer
Tap any service card and the timer starts immediately — no extra button to press. The time entry dialog opens showing your running timer with actual and billable elapsed time, plus a Stop button. You can switch to Manual mode if you prefer to log past work instead.
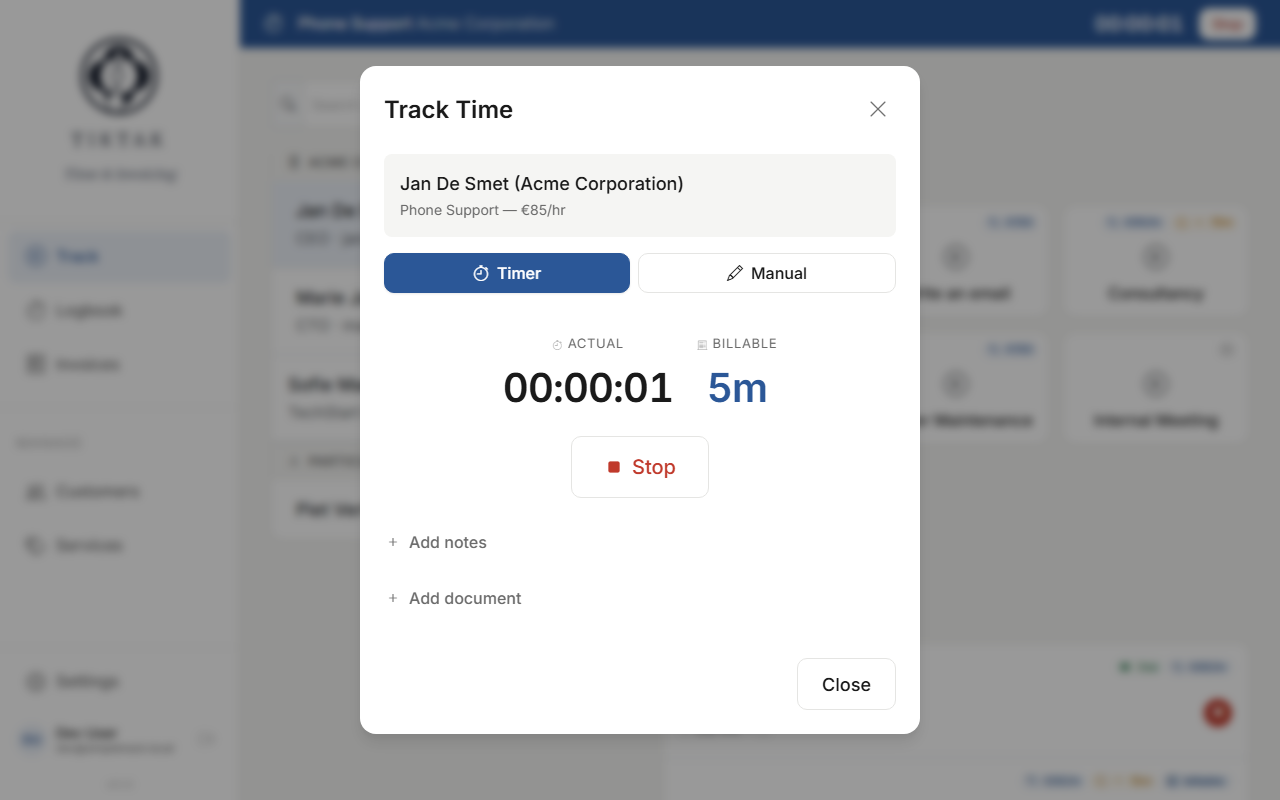
Tip: You can run multiple timers at once — one for each customer/service combination. Start a timer for one job, then go back, select another customer and tap another service card.
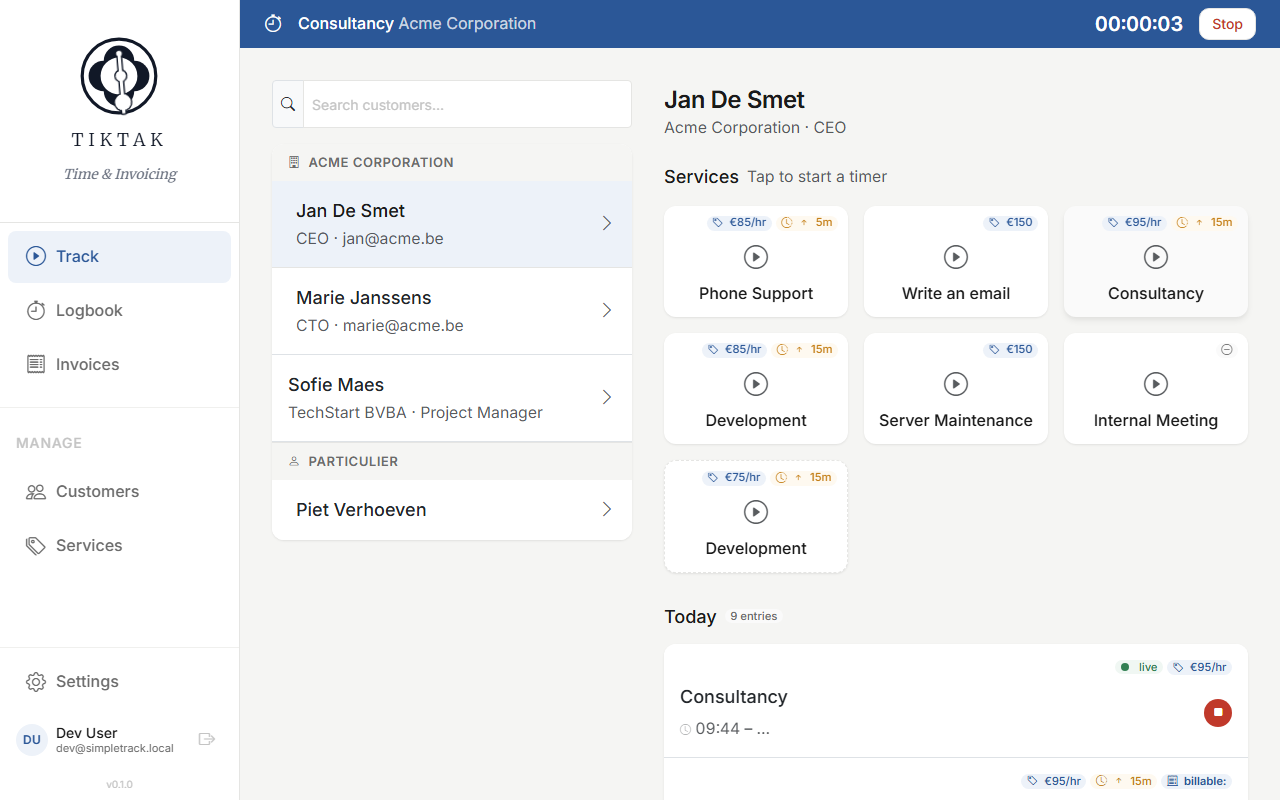
Timer bar
When a timer is running, a sticky timer bar stays pinned at the top of the page — even as you scroll. It shows the service name, customer, elapsed time, and a Stop button. If you have multiple timers running, the bar shows a count badge — click it to expand a dropdown listing all active timers.
Review Time Entry
When you stop a timer, the Review Time Entry card appears. It shows two key numbers side by side: Actual (exactly how long you worked, down to the second) and Billable (the rounded duration that will go on your invoice). A dual-handle time slider lets you fine-tune the start and end times, and you can change the date to move the entry to a different day — handy for logging yesterday's work.
Your exact time is preserved by default — only adjust the slider if you need to. You won't lose any time.
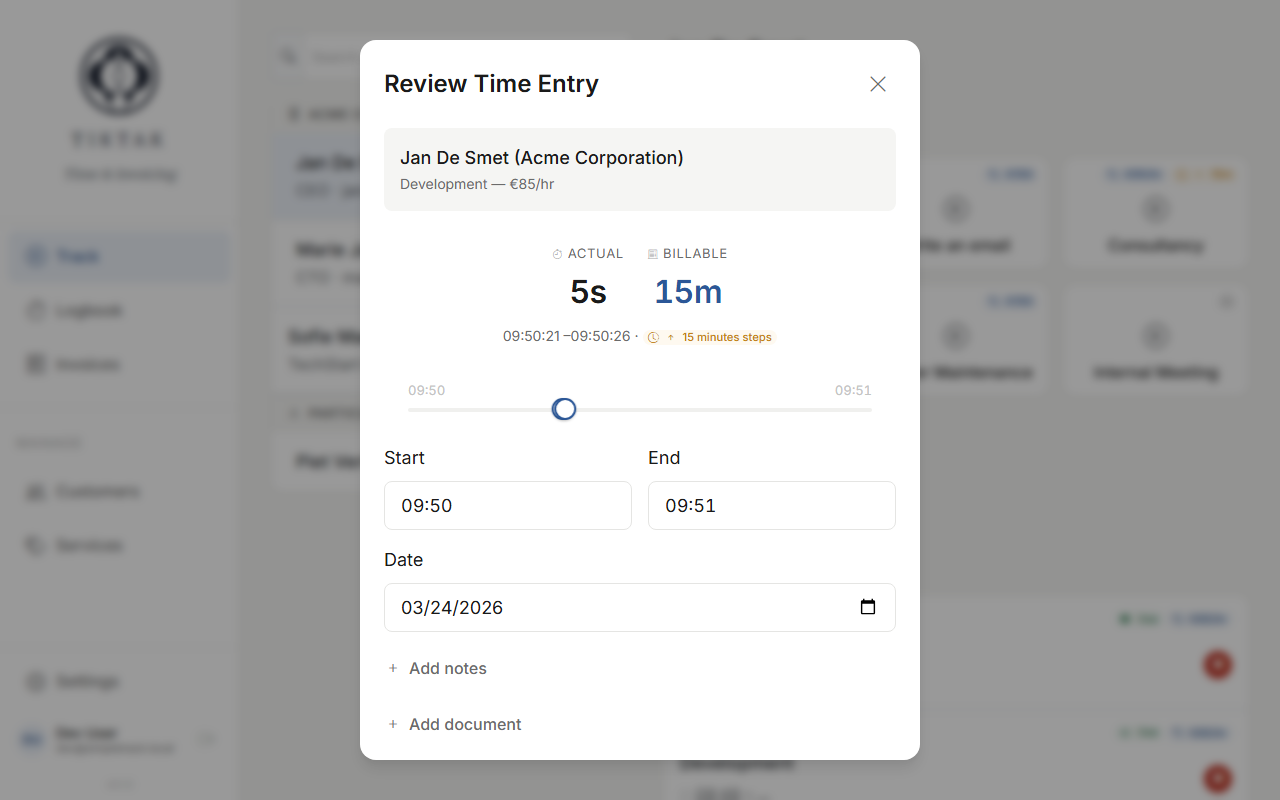
Tip: You can also add notes and attach documents from the review card before saving.
Today's entries
Below the service grid on the Track screen, you'll see all time entries logged today for the selected customer. Running entries show a live badge with a Stop button. Completed entries show the duration and a Continue button — tap it to resume tracking where you left off. The page automatically scrolls to the newly created entry so you see it right away.
At the bottom, the daily total shows both actual and billable time as clear pill badges — making it easy to see at a glance how much you've tracked.

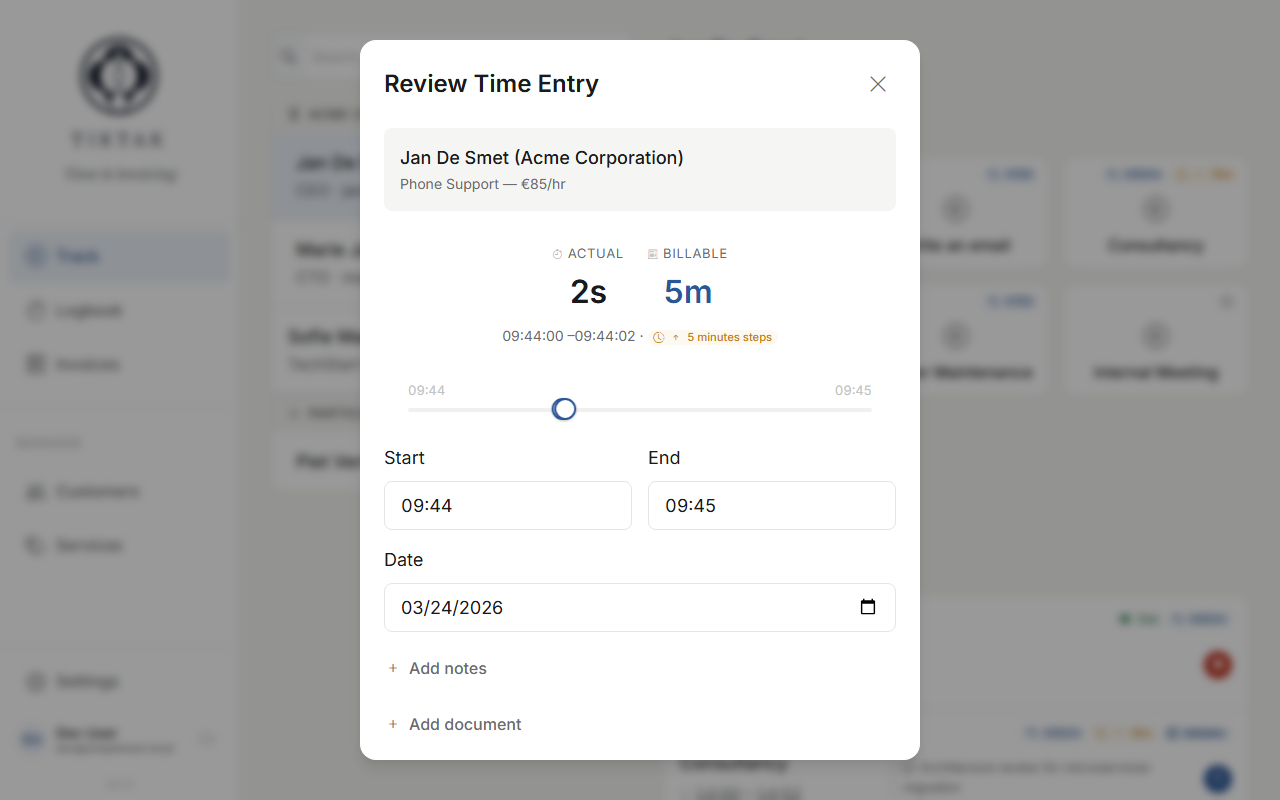
Actual vs billable
TikTak distinguishes between actual time (exactly how long you worked) and billable time (the rounded amount you charge). When a service has a rounding rule (e.g. round up to the nearest 15 minutes), the billable duration may be higher than the actual duration.
You'll see both values in two places:
- The Review Time Entry card (shown above) displays actual and billable side by side when you stop a timer
- Each entry in today's list and the logbook shows pill badges — actual (greyed out) and billable (blue accent)
If the service has no rounding, actual and billable are the same and only the billable pill is shown. You can set the rounding rule per service in Services — options are 5, 15, or 30 minutes (always rounded up in your favour).
Tip: Rounding is applied per invoice line, not per entry. If you have three 22-minute entries for the same service, the total actual time (66 min) is rounded once to 75 min — not three times to 90 min. This is fairer for your clients.
Non-billable services
Need to track time that you don't charge for — like internal meetings, admin work, or travel? Simply create a service with a €0 per hour rate in Services. TikTak treats it as non-billable: the service card on the Track screen shows a grey dash icon instead of a rate, and entries logged against it show a non-billable pill.
This is useful when you want to see where your time goes without inflating your billable totals. The entries still appear in your logbook — they just won't generate a charge on invoices.
Tip: You don't need a special "non-billable" toggle. Just set the hourly rate to €0 when creating the service — that's all it takes.
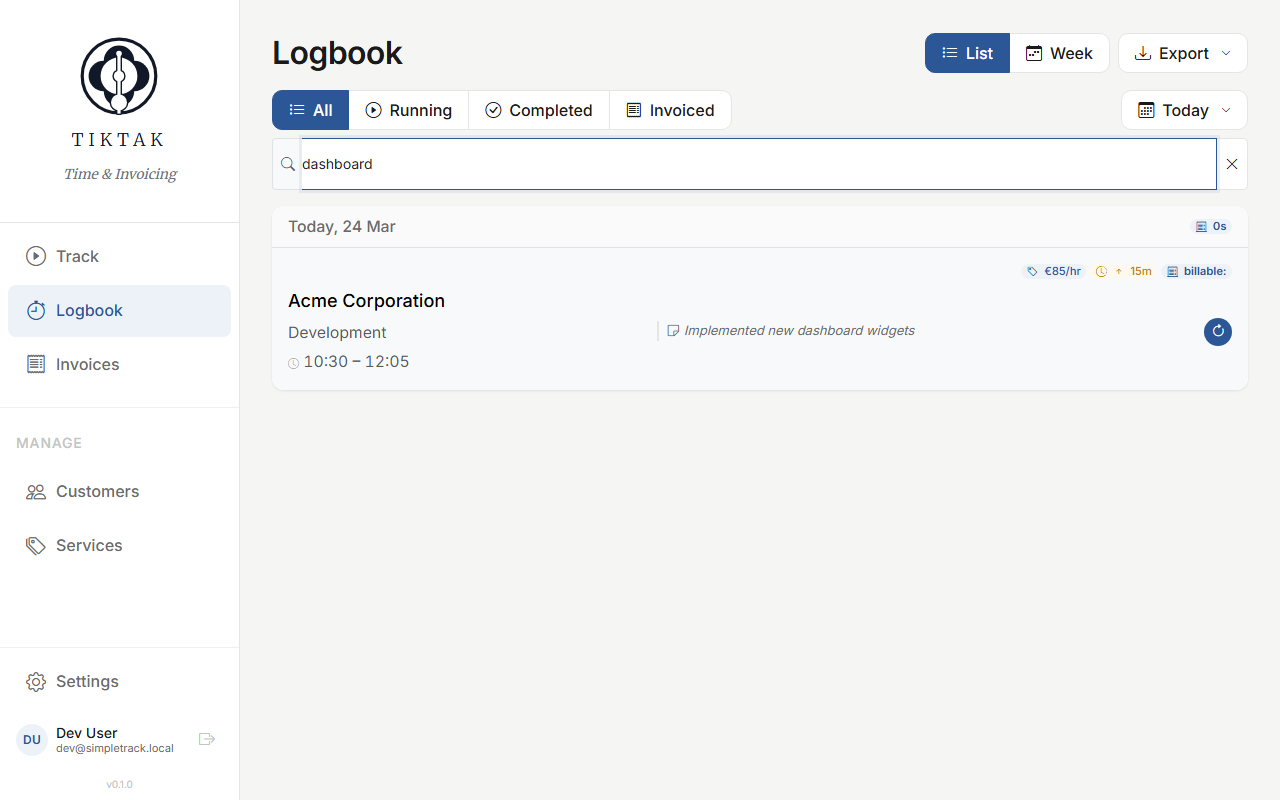
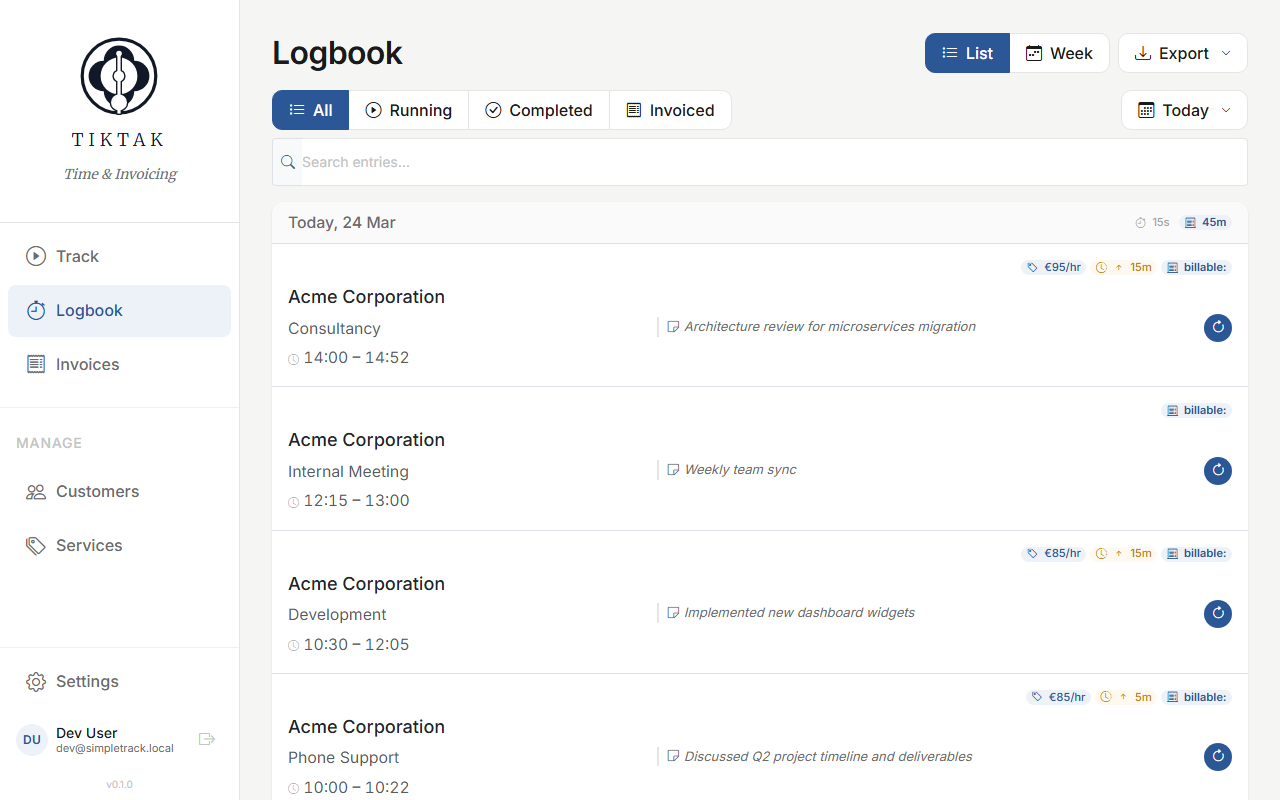
The logbook
For a complete history of all your time entries, head to the Logbook. Entries are grouped by date, each showing the customer, service, time range, notes, and rate/billable pills. The date header shows the daily total as a billable pill. Use the filter buttons (All, Running, Completed, Invoiced) and the date picker to narrow your view.
Manual entry
Need to log work from earlier today or yesterday? Go to the Track screen, select the customer, and tap the service card. When the timer dialog opens, switch to Manual mode. This opens the Review Time Entry form where you can set the start time, end time, and date — just pick a past date to log yesterday's work. Add notes, then save.
Tip: Add detailed notes to each entry. They'll appear on your invoices and help you remember what you did.
Editing entries
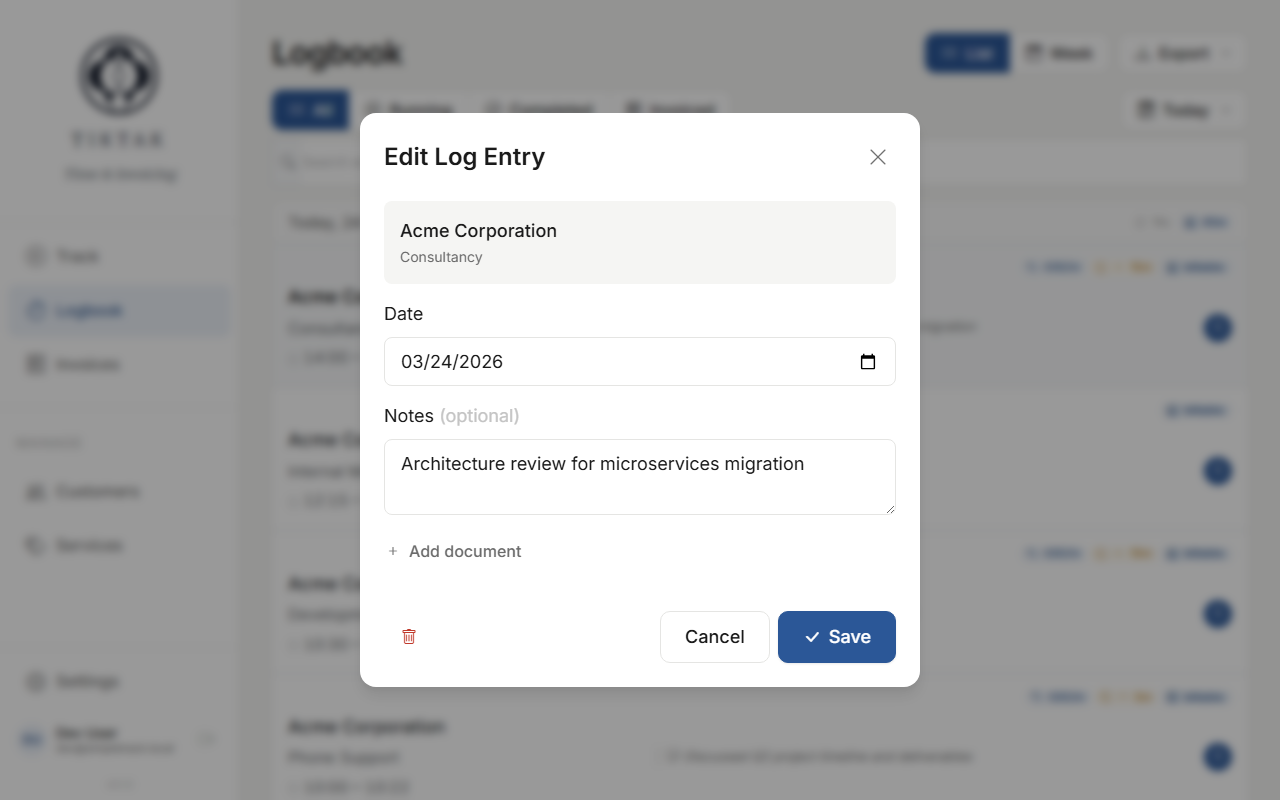
Click any entry in the logbook to open the Edit Log Entry dialog. You can change the date, adjust the start/end times with the slider, update notes, or attach documents. The same editor works from the Today section on the Track screen.
Search & filter
Use the date picker to view specific periods and the search bar to filter by keyword. The status filter lets you quickly find running, completed, or invoiced entries.